You would think iMovie would export perfectly to the iPhone… but alas, it does not. But getting it onto your phone so that you can post to Instagram or one of the other apps out there, the process is pretty straight forward.
A couple of assumptions being made about this post:
- You own an Apple Computer, whether it’s an iMac or Macbook doesn’t matter
- You own an iPhone
Without the above two requirements, this whole thing falls apart.
Here are the steps to getting an iMovie export file onto your iPhone:
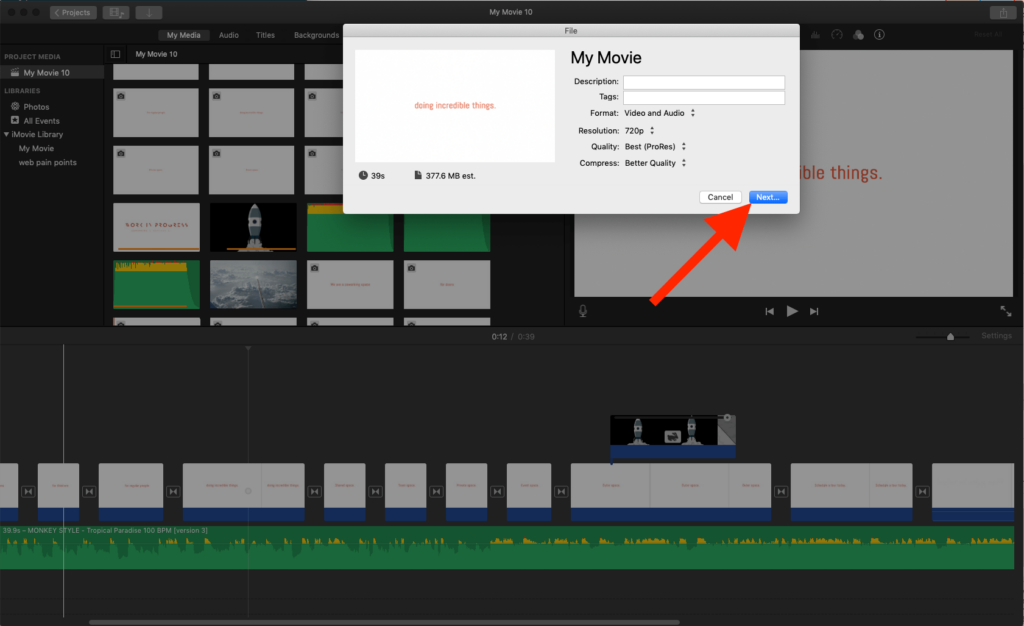
- Export from iMovie to File (recommend using the highest settings possible, but ultimately doesn’t affect the process.)
- Open the exported file with QuickTime
- Click File -> Export As -> 4k (or 1080 if 4k not available)
- Right-click on the newly exported file, select Share -> AirDrop -> Select your device from the list
Step by Step iMovie to iPhone (with Photos)
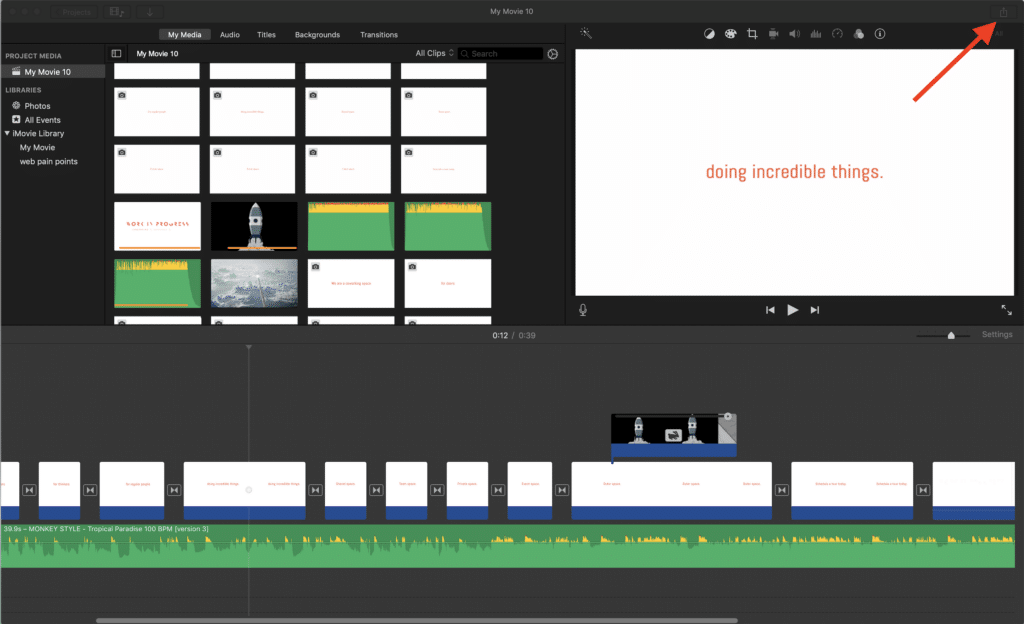
On iMovie, click the share icon in the top right corner of the screen:
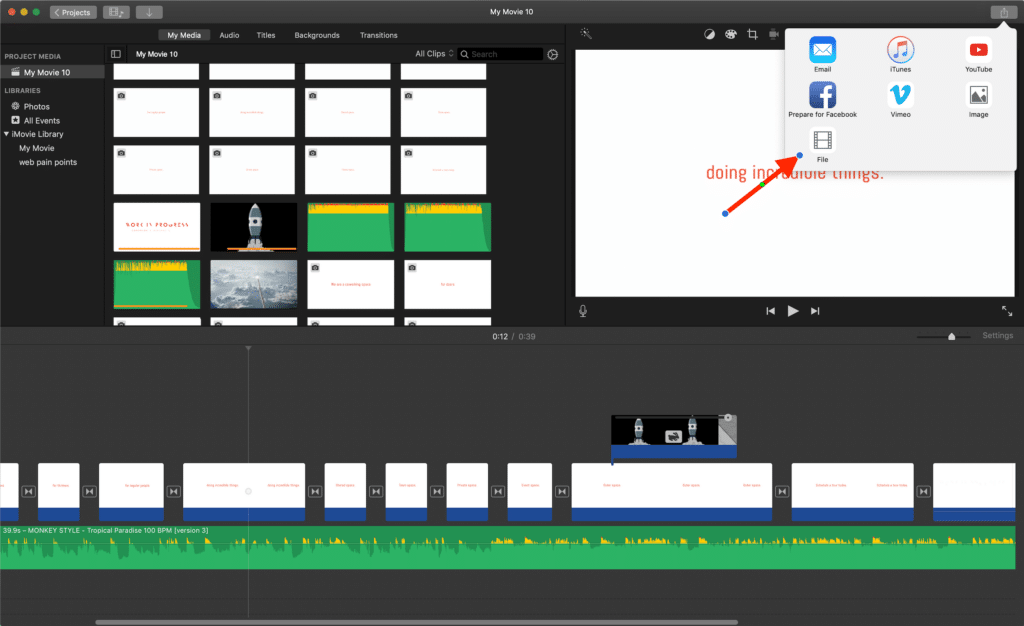
Choose the “File” option:
Set the settings as high as possible, then click next:
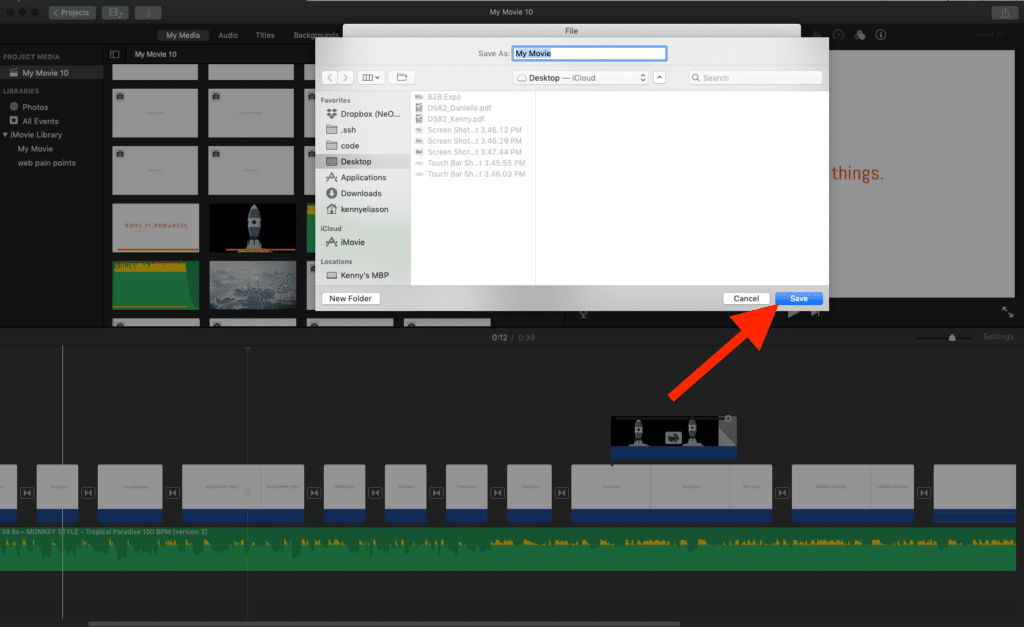
Save it to somewhere you can easily access, like your desktop, and click save:
Open the file from your desktop with Quicktime:
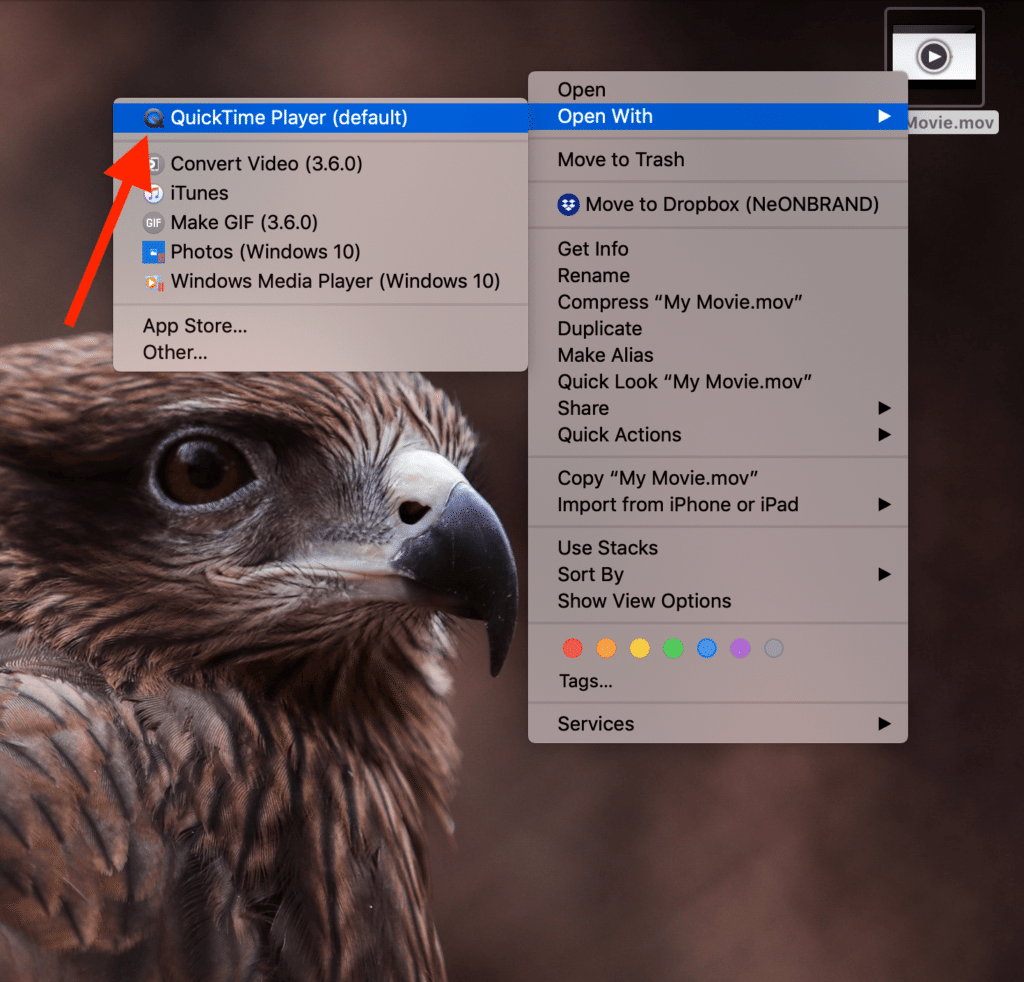
In Quicktime, choose File -> Export As -> (my preference, select the highest available resolution):

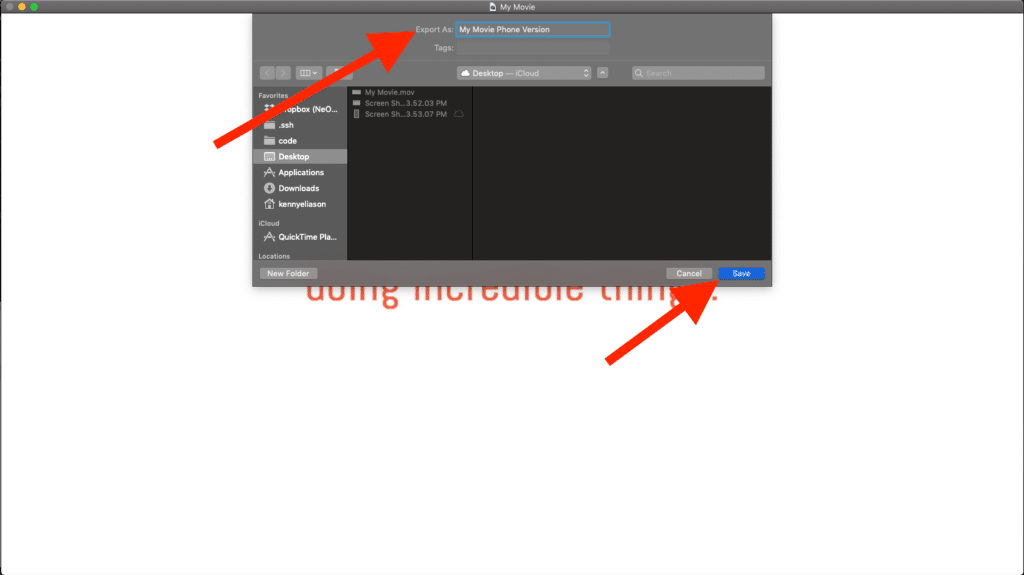
Change the name so that it’s different than the original export, and save it to a spot you can easily access (like back to the Desktop):
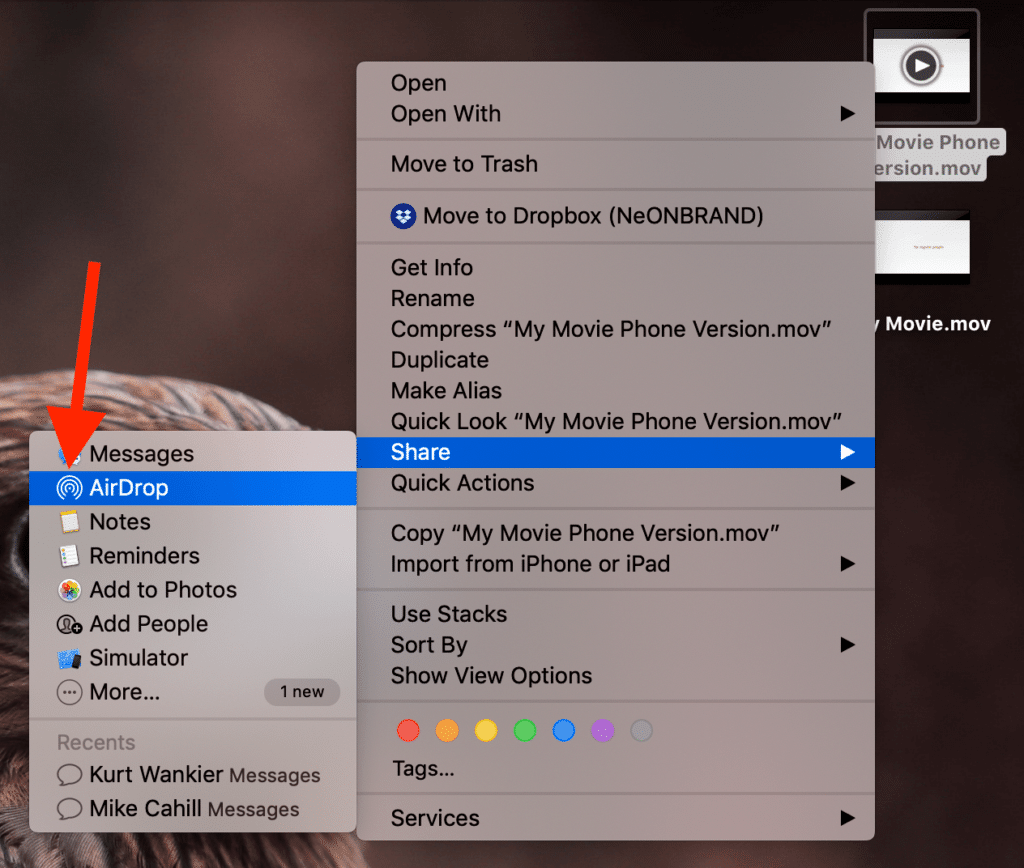
Right-click on the newly created file, Share -> AirDrop:
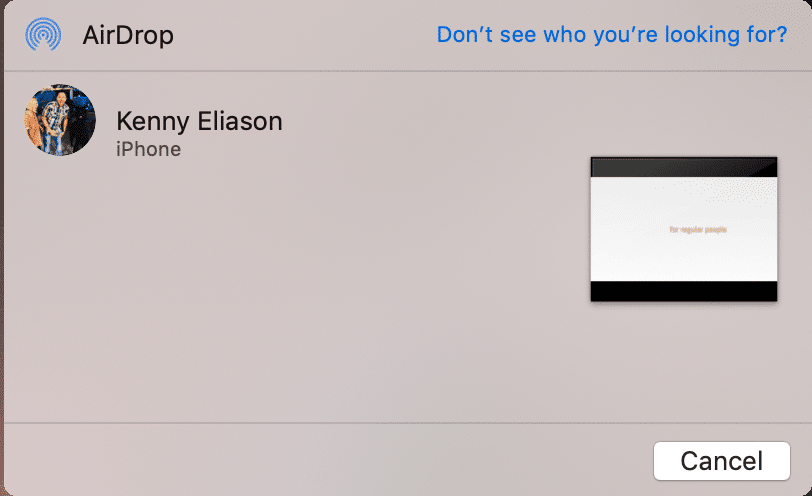
Select your device from the available list (if you don’t see your device, make sure it is unlocked):
The video will then appear in your regular Photos App on the iPhone:

Didn’t work for me unfortunately, won’t airdrop to my phone. States it need to be a Mac